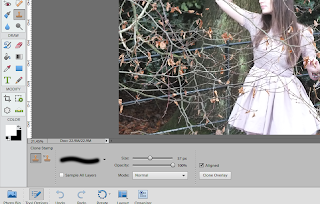
Firstly I started off by opening the photograph file, zoomed in to the appropriate size and started editing straight away. The results were of immediate effect, and worked really well in order to get rid of that fence!
 Firstly I chose my brush In which was a default brush (1) set my brush size to 60 and varied accordingly.
As you can see the results are staring to take shape and the image is starting to look slightly more appropriate for a digipack.
Throughout the editing process of using the clone tool I chose various selections from the image, in which did not include the fence, in order to avoid repeated patterns.
By the end of the editing process of using the clone tool I began to see the image coming together in which I managed to achieve the following...


No comments:
Post a Comment